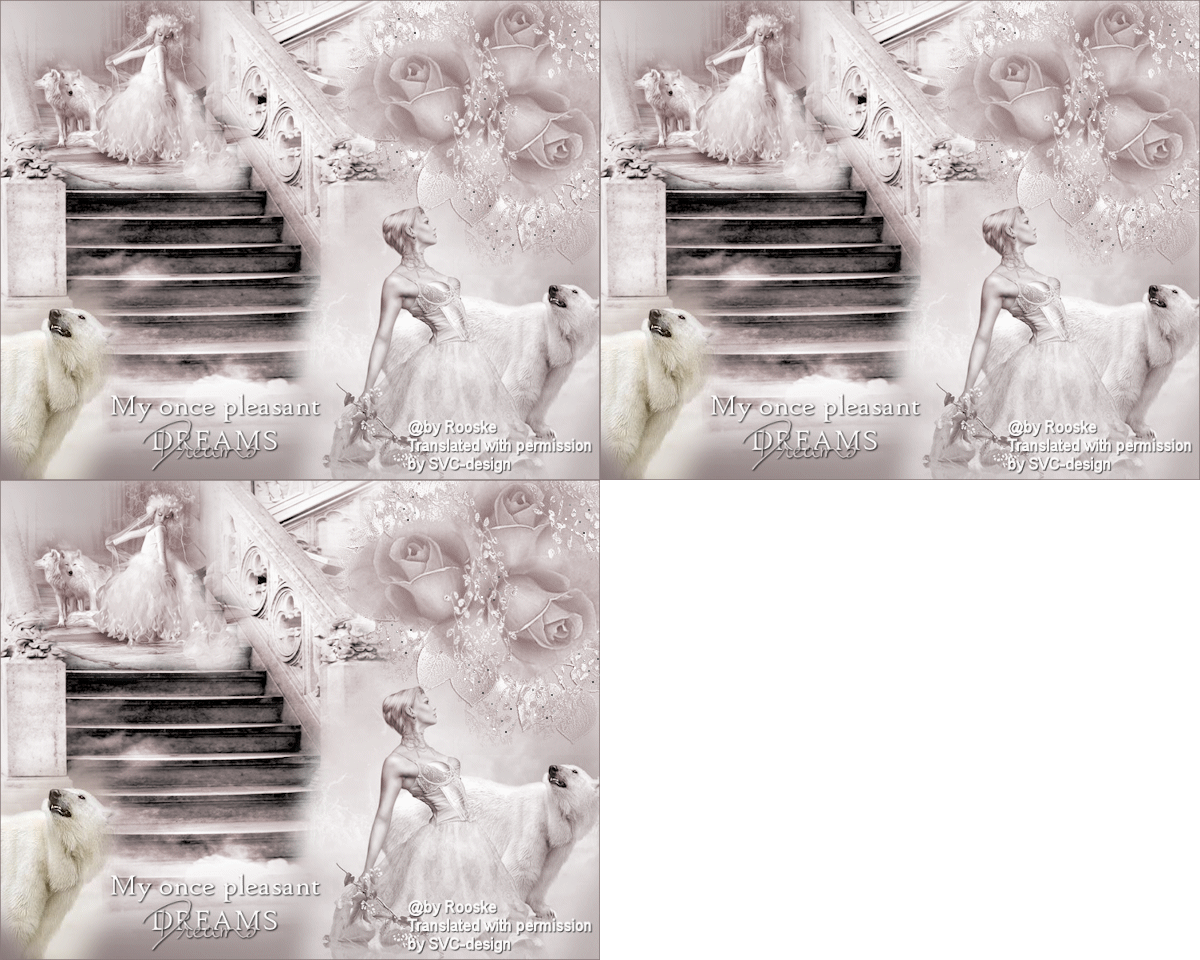

This lesson is made with PSPX9
But is good with other versions.
© by SvC-Design

Materialen Download :
Here
******************************************************************
Materials:
Dreams 02.png
Dreams 03.png
Dreams 04.png
Dreams 05.png
Dreams 06.png
LD-silver3fr.gif
Leny-misteds35.psp
Leny-misteds56.psp
******************************************************************
Plugin:
NO
******************************************************************
color palette
:

******************************************************************
methode
When using other tubes and colors, the mixing mode and / or layer coverage may differ
******************************************************************
General Preparations:
First install your filters for your PSP!
Masks: Save to your mask folder in PSP, unless noted otherwise
Texture & Pattern: Save to your Texture Folder in PSP
Selections: Save to your folder Selections in PSP
Open your tubes in PSP
******************************************************************
We will start - Have fun!
Remember to save your work on a regular basis
******************************************************************
1.
Open a new transparent image of 750 X 600 pixels
2.
Foreground:# e7e1e1
Background: #8a7b7b
3.
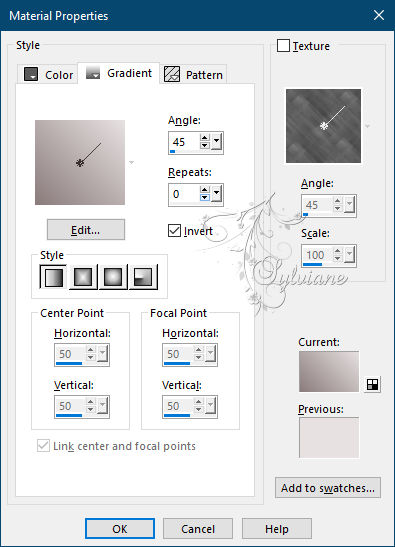
Make a gradient of the foreground, linear, angle 45 - repeat 0, invert checked

4.
Fill your image with gradient
5.
Open Dreams 02.png
Edit – Copy
Edit - Paste as new layer
move them to the left and up
6.
Open Leny-misteds56.psp
Edit – Copy
Edit - Paste as new layer
drop right
7.
Resize image 80%, uncheck all layers
8.
Set the layer to luminance
9.
Open Dreams 03.png
Edit – Copy
Edit - Paste as new layer
put them above right
10.
Open Dreams 05.png
Edit – Copy
Edit - Paste as new layer
put them right at the bottom of the stairs
11.
Set the layer to luminance
12.
Open Dreams 04.png
Edit – Copy
Edit - Paste as new layer
image resize 70%,
put them at the top of the stairs
13.
Open Dreams 06.png
Edit – Copy
Edit - Paste as new layer
put in a nice place
14.
When everything is to your liking
Layer – merge – merge all (flatten)
15.
Put your name on your creation
16.
Image - Add Borders -1 pix - color: background
17.
Resize image 600 pix longest side
18.
We are going to add animation
19.
Copy your creation
go to animation shop and paste there as new animation
20.
Open the LD Silverstar in the animation shop
21.
Your animation has 3 frames
22.
Duplicate your creation up to 3 frames
23.
Activate the animation and go to edit, select all
24.
Make sure you are on the first frame of the animation
26.
Go to copy, to your crea and paste into selected frame
27.
Repeat pasting in selected frame a few times (see my creation)
28.
Save your work as a gif.
Back
Copyright Translation © 2021 by SvC-Design